
How Can We Help?
Google-Meet your class
Google Meet is an excellent, low-bar, intuitive tool for videoconference meetings with your students, whether it’s office hour, a tutorial, or a class. It certainly has limitations — like, it’s hard to have a meaningful group discussion with 30 people. Then again, it’s hard to have a meaningful group discussion with 30 people no matter what the venue.
What you need
To run a videoconference meeting so people can see and hear you, you need:
- a workstation, laptop, or mobile device with a camera and mic
- a modern (updated) browser (I use Chrome)
- a Google account (ACC faculty and staff automatically have Google Enterprise, which has lots of goodies that can help you teach online)
Try it!
Set up the Hangout Meet using Google Calendar
- log into Google and open Google Calendar
- navigate to google.com and sign in with your ACC credentials (email address, then EID and password)
- click on the block with nine dots and select Google Calendar
- pick and click on a day and time
- a box opens that lets you enter a title
- leave “event” selected
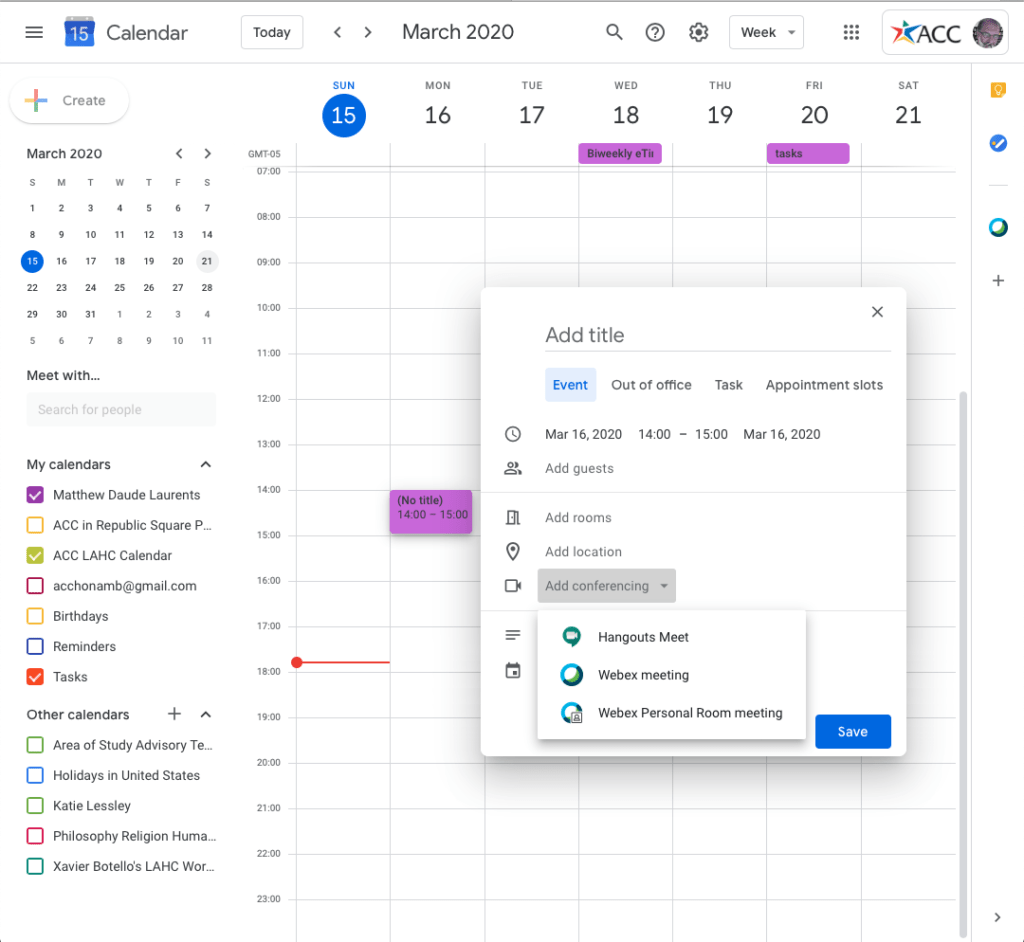
- click on “add rooms, location, or conferencing”
- a drop down gives you options: click on “Add conferencing”
- Select Hangouts Meet
- Add a description, if you like
- You can drop a list of email addresses in the Add guests box, and everyone you invite will get an invitation that they can respond to and a calendar item with info about joining the meeting
- This is great if you want to know beforehand who is joining the meeting
- But what’s cool about Google Meet is that anyone with the link to the meeting (or the telephone number) can join the meeting.
- Click on “Join Hangouts Meet” to see the link and phone number.
- Why is that cool? Because you can just copy the link and drop it into an email to all your students in Blackboard. (They won’t get an invitation or calendar item, but this is a very easy way to get the word out.)
- Ready to start your meeting!
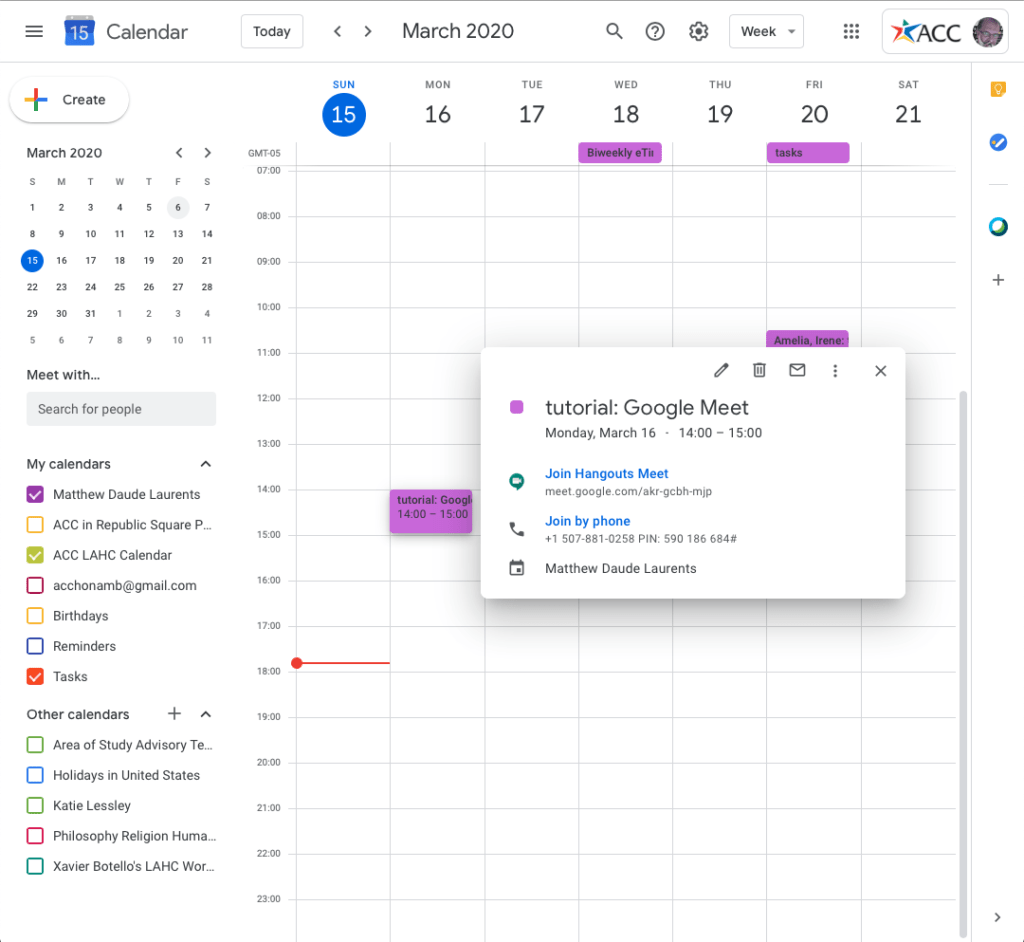
- go to Google calendar and click on the meeting
- a box opens with info on how to join (this is what your students would see if you sent them a cal invitation)
- Click “Join Hangouts Meet”
- Your browser (I use Chrome for this) opens and tries to set up the meeting
- it will ask you to allow access to the mic and camera — you have to allow access to be seen or heard
- Note that it asks if you’re ready to join — and tells you who has already joined.
- When you’re ready, click Join meeting
- Running your meeting
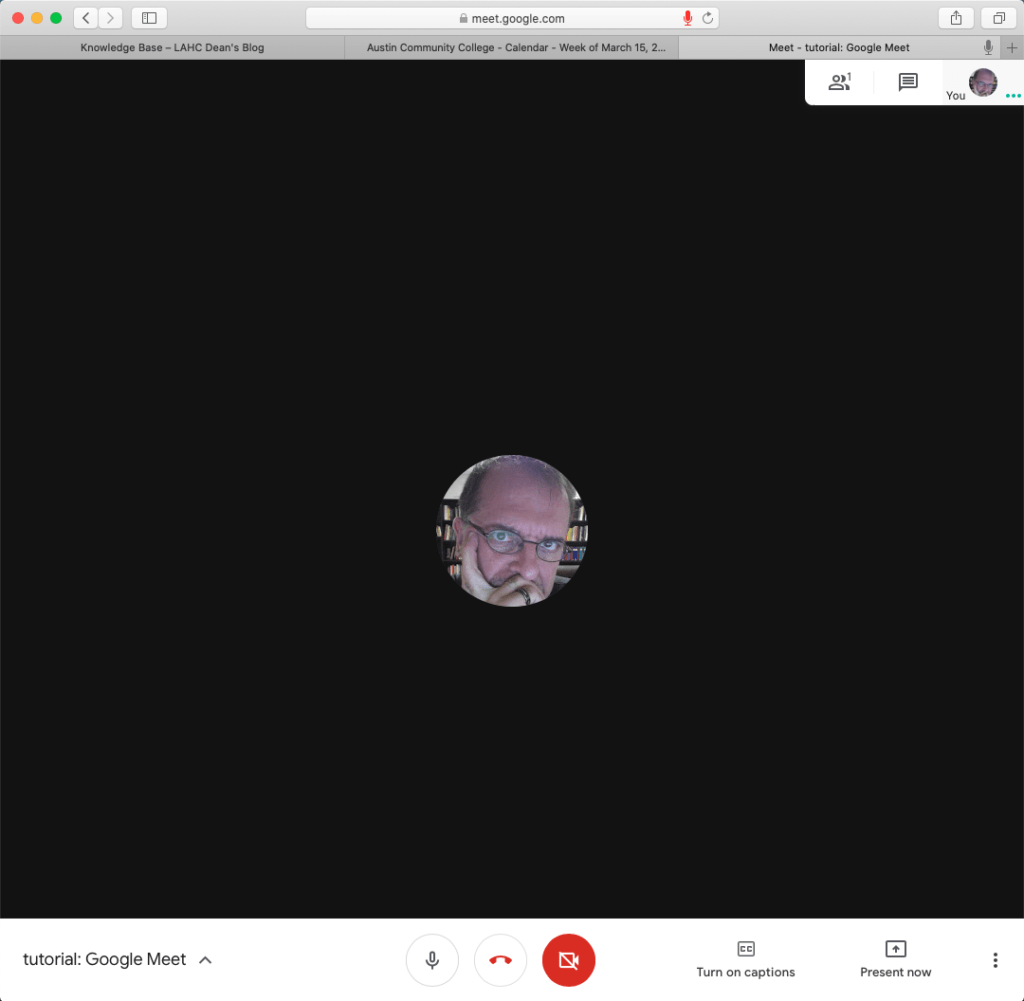
- Once you join the meeting, a bigger box opens. You’ll see a strip across the bottom with things like “Meeting details” a mic symbol, etc.
- click on the mic to mute/unmute your mic
- it’s a good idea to ask your students to mute their mics unless they need to speak to the group, because the mic tells the software which camera to pay attention to. If people are making noise, or if there’s background noise, then the camera will focus on them.
- click on the camera to stop/start broadcasting the video of you
- click on the mic to mute/unmute your mic
- In the upper right corner of the meeting window, you’ll see a small strip that has a person symbol, a balloon, and a little box of yourself plus little boxes for all the other participants in the meeting.
- you can click on the little person icon to see a list of participants
- you can click on the balloon to open the chat box — a panel that runs vertically over the right portion of the picture
- people in your meeting can use the chat to send messages, ask questions, make comments, etc., without getting the floor (the camera). This is a great way to let your students post questions as you explain something, because you can come back to their questions and work your way through them once you’ve finished the explanation. It’s also a great way to survey student responses — you can ask them questions while you’re explaining.
- Note that whoever is speaking (assuming their mic is on!) will get the camera. This is a great way for your students to do presentations to the class. And you can use the chat box to pose questions or make comments to the other students without interrupting the presenter
- Once you join the meeting, a bigger box opens. You’ll see a strip across the bottom with things like “Meeting details” a mic symbol, etc.
- Ending your meeting
- Remind everyone about the next assignment, tell them to have a great day, and click the red phone symbol in the strip across the bottom — done!
Bonus: Two sweet Google Meet tricks
Here are two slightly advanced (but in my world, indispensable) teaching tricks.
Trick #1: handouts
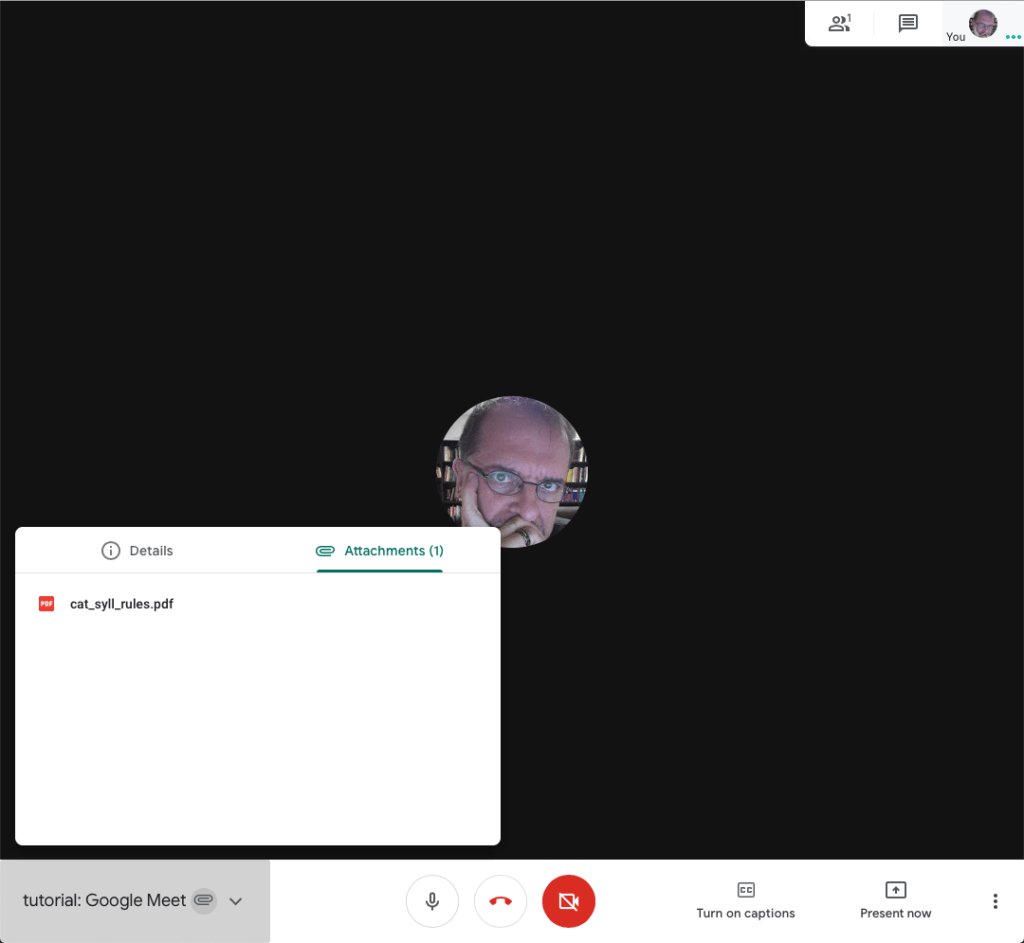
- Click on Meeting details: a box opens with the link to join the meeting (which is cool). In the strip across the top you’ll see “Attachments”
- This is the place you’ll find any documents you attached to the calendar item — like a pdf of the handout you’re going to discuss, for instance. This means you can actually send your students the handout for the class with the calendar invitation to the class. That’s sweet.
Trick #2: present something
- In the strip across the bottom of the meeting window, click on “Present now”
- you get the option to present your screen, which means you are broadcasting everything you are doing on your screen — like using your mouse to point out things in a document, or using a simple drawing program to draw Venn diagrams because you want to show people the beauty of Aristotelian logic. Yeah.
- Note that as long as your mic is still on, you can also talk while your presenting — great for doing a tutorial, like how to construct a truth table.
- When you’re done broadcasting your screen just go back to the meeting window and click Stop presenting
Was this tutorial useful? Please take a moment to rate it!
Thanks!